

PARTNER
Partner
Basic level
Key benefits
Terms
Details
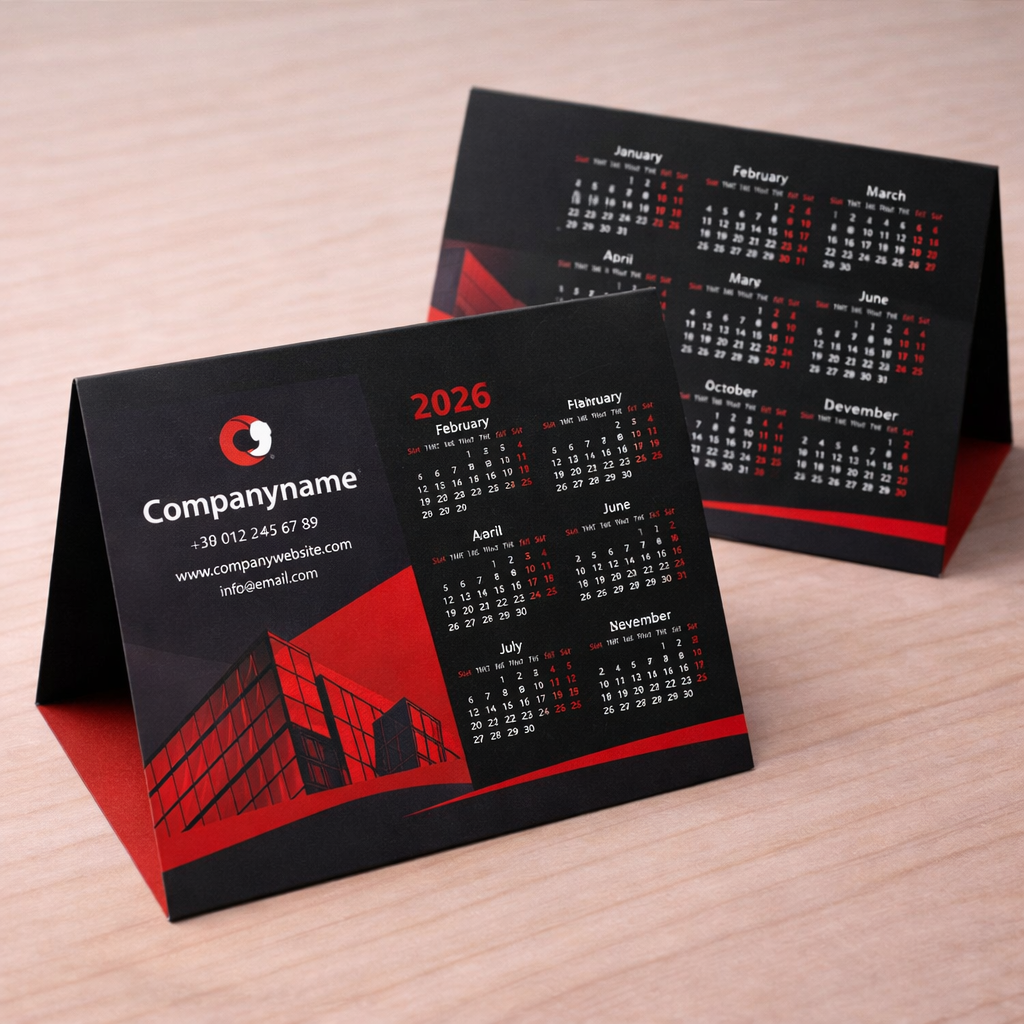
The “Desk tent calendar” option addresses practical requirements in daily planning, corporate gifts, promotions and year-round brand visibility. Define the application first, then select production parameters that support it. A tent-calendar structure must remain stable after creasing and assembly; orient the calendar grid for reading from a working position.
Before ordering “Desk tent calendar”, define format, calendar grid, year, substrate, construction and the area reserved for branding. Every choice affects appearance, usability, lead time and unit cost. Two quotations are comparable only when their specifications match. A change in application may justify a different production route.
The practical value of “Desk tent calendar” depends on how closely its format fits the real situation. List mandatory information first and define one primary reader action. Remove elements that do not support that action. Longer explanations can move to a web page reached through a QR code.
Colour for “Desk tent calendar” requires realistic expectations. A monitor emits RGB light, whereas print uses inks on a physical substrate. The screen is therefore not an exact colour proof. Identify critical brand colours and agree on a suitable control method before the complete run begins.
Choose material for “Desk tent calendar” by function, not from a sample photograph alone. Weight affects stiffness, surface influences colour and touch, and finishing changes resistance during normal handling. The current product configuration defines which combinations can actually be ordered.
A common risk with “Desk tent calendar” is a single calendar-grid error can make the complete print run unusable. Technical preflight identifies format, bleed, resolution and font problems. It does not replace editorial proofreading. Names, telephone numbers, prices, dates, addresses and QR destinations must be confirmed before final approval.
In artwork for “Desk tent calendar”, dates, weekdays, holidays and month order require proofreading beyond technical file checks. Extend edge-to-edge backgrounds into bleed. Keep copy, logos and codes within the safe area. Inspect raster images at final scale, and either embed fonts in the PDF or convert them to outlines.
To price “Desk tent calendar”, select the available characteristics, quantity and production time. The calculator then shows the cost for that specification. Upload finished artwork during checkout. Non-standard materials, dimensions or finishing should be agreed separately before payment.
Production of “Desk tent calendar” starts after payment and approval of a print-ready file. Shipping time is separate from manufacturing time and depends on the carrier and destination. Urgent schedules should include an allowance for corrections, approval, packing and dispatch.
A repeat run of “Desk tent calendar” can move faster when the previous order number and approved PDF are available. Check the file again whenever contacts, price, date, link or product information changes. This prevents obsolete details from entering a new batch.
Calculate the quantity of “Desk tent calendar” from its real period of use. For an event, allow for attendance and a sensible reserve. For routine work, use average consumption and the interval before reordering. Excess stock may become obsolete when prices, contacts or branding change.
Store the finished “Desk tent calendar” run in a dry room away from direct sunlight and abrupt temperature changes. Paper and board respond to humidity, so open protective packing close to use. Storage matters particularly for coated, folded or adhesive products.
When “Desk tent calendar” requires several language or product versions, approve one visual system first. Keep the grid, fonts, logo and technical zones consistent, then proof variable copy separately. This maintains recognition and reduces the risk of assigning artwork to the wrong version.
After receiving “Desk tent calendar”, check the number of packages, edge condition, front-to-back consistency and the legibility of control elements. Record any concern immediately after unpacking. Before reordering, note which specification choices performed well in actual use.
Do not treat a photograph or screen preview of “Desk tent calendar” as an exact scale proof. Open the PDF at 100 percent and inspect the smallest copy before approval. Where practical, print a rough sheet at actual size and assess the composition by hand.
Before paying for “Desk tent calendar”, answer four questions. Where will it be used? Who will read or handle it? Which information is mandatory? What should the customer do next? Clear answers keep the design focused and prevent unnecessary production costs.
The production brief for “Desk tent calendar” should state the intended use, format, calendar grid, year, substrate, construction and the area reserved for branding, the number of versions and the required delivery date. List mandatory elements, packing expectations and service conditions separately. This information makes parameter conflicts visible early, removes ambiguity from the artwork review and allows the required configuration to be priced accurately.
A common risk with “Desk tent calendar” is a single calendar-grid error can make the complete print run unusable. Technical preflight identifies format, bleed, resolution and font problems. It does not replace editorial proofreading. Names, telephone numbers, prices, dates, addresses and QR destinations must be confirmed before final approval.
Need a different size, material, finish, quantity or a custom product? Message us on Telegram. We will check production feasibility and prepare an individual quote.
Check the dimensions, safe area, colour profiles and fonts.
214×300 mm
210×296 mm
206×292 mm
The artwork did not pass validation.
A manager will check the file and explain how to correct its size, resolution, colour space or format.